Deploy
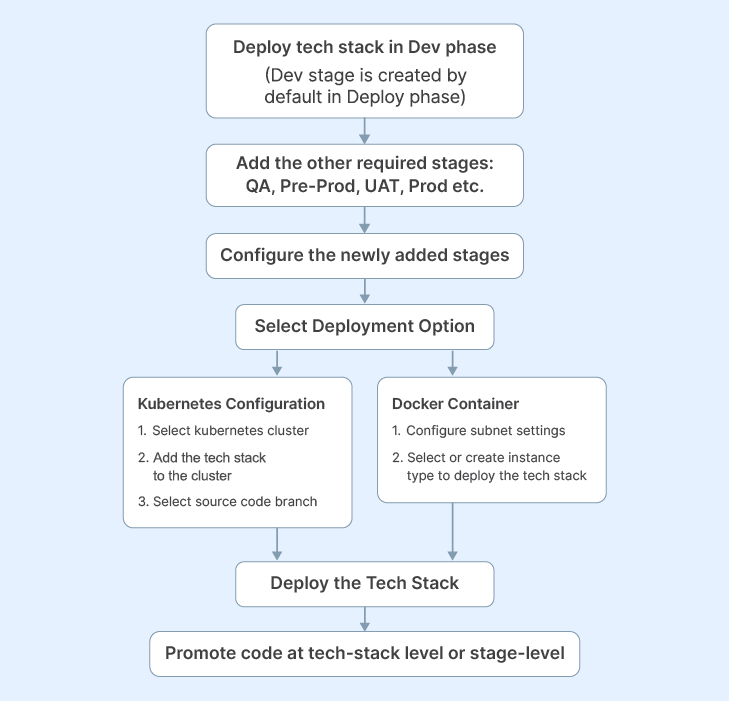
In the Deploy phase of a product feature you can add stages to the deployment workflow, configure new instances, deploy tech stacks to the newly added stages, configure the source code branch for each tech stack and promote code to different stages of the deployment workflow. When you add a tech stack in the Develop phase, the Dev stage is created by default in the Deploy phase. You can add the other stages to the deployment workflow as required.
Refer to the diagram below to understand the high-level tasks that you must perform in the Deploy phase:
How does code promotion happen in the deploy phase?
In the Deploy phase, code promotion can happen at the tech stack level or at the stage level. For tech stack level code promotion, you must have the same tech stack deployed in both the stages between which you want to promote the code. For stage level promotion all the tech stacks in the previous stage must be deployed in the stage to which you want to promote the code. If you do not add all the tech stacks, then you cannot promote code at the stage level.
Create a deployment workflow
- On the project page click Deploy. The Dev stage is added by default if you have added at least one technology in the Develop phase.
- You can create the deployment workflow by adding a new stage. Click Add New Stage and enter the following details:
- Name of the stage
- Select Type from the options - Dev, Demo, UAT, Prod
- Select Deployment mode - Docker, Kubernetes
- Select the cloud account.
- Select Kubernetes clusters (this option is available if you select Kubernetes in deployment mode).
- Select Load Balancer type - Automatic.
- Select Load Balancer scheme type - Private, Public.
- Jenkins account.
- SonarQube account.
- Cloud Tags.
- Click Add.
Deploy technologies to the newly added stage
- In the newly added stage, configure the required instance type:
- Name
- Hard Disk Size - 20GB, 30GB, and so on.
- Select the Cloud Account
- Use Public Subnet toggle.
- Click Save.
Add the tech stack to the instance type. Click Edit Details to configure the source code branch for the stage.
- Click the arrow on the Deploy button and select the tech stack that you want to deploy to the stage.
Until the instance is provisioned and the technology is deployed, you see a Refresh button at the top-right corner of the screen, you can click it to know the exact status. After the deployment is complete, Refresh changes to Done and the deployed technology shows a green tick.
Promote code to various stages of deployment workflow
- On the Deployment Workflow screen, click on a stage from which you want to promote code.
- Select the stage to which you want to promote the code and click Promote. On the confirmation screen, click Proceed.
For more details, refer to the following topics:
| What's next? Audit History |